Customize a community-maintained upstream image#
This instructional guide shows you how to add packages to a community-maintained upstream image. In this example, we add the Python package xarray to the jupyter/scipy-notebook image maintained by the Jupyter Docker Stacks community.
Set up the GitHub repository and connect it to quay.io#
Fork the GitHub repository example-inherit-from-community-image into your GitHub account.
We recommend using quay.io to host your custom image. Navigate to quay.io and log into your account.
On quay.io, click Create a new repository and name your repository, e.g.
jupyter-scipy-xarray. Set the repository to Public and leave it as an (Empty repository).
Allow robot access to your quay.io repository#
The following summarizes Section 3.2. Allowing robot access to a user repository of the quay.io documentation.
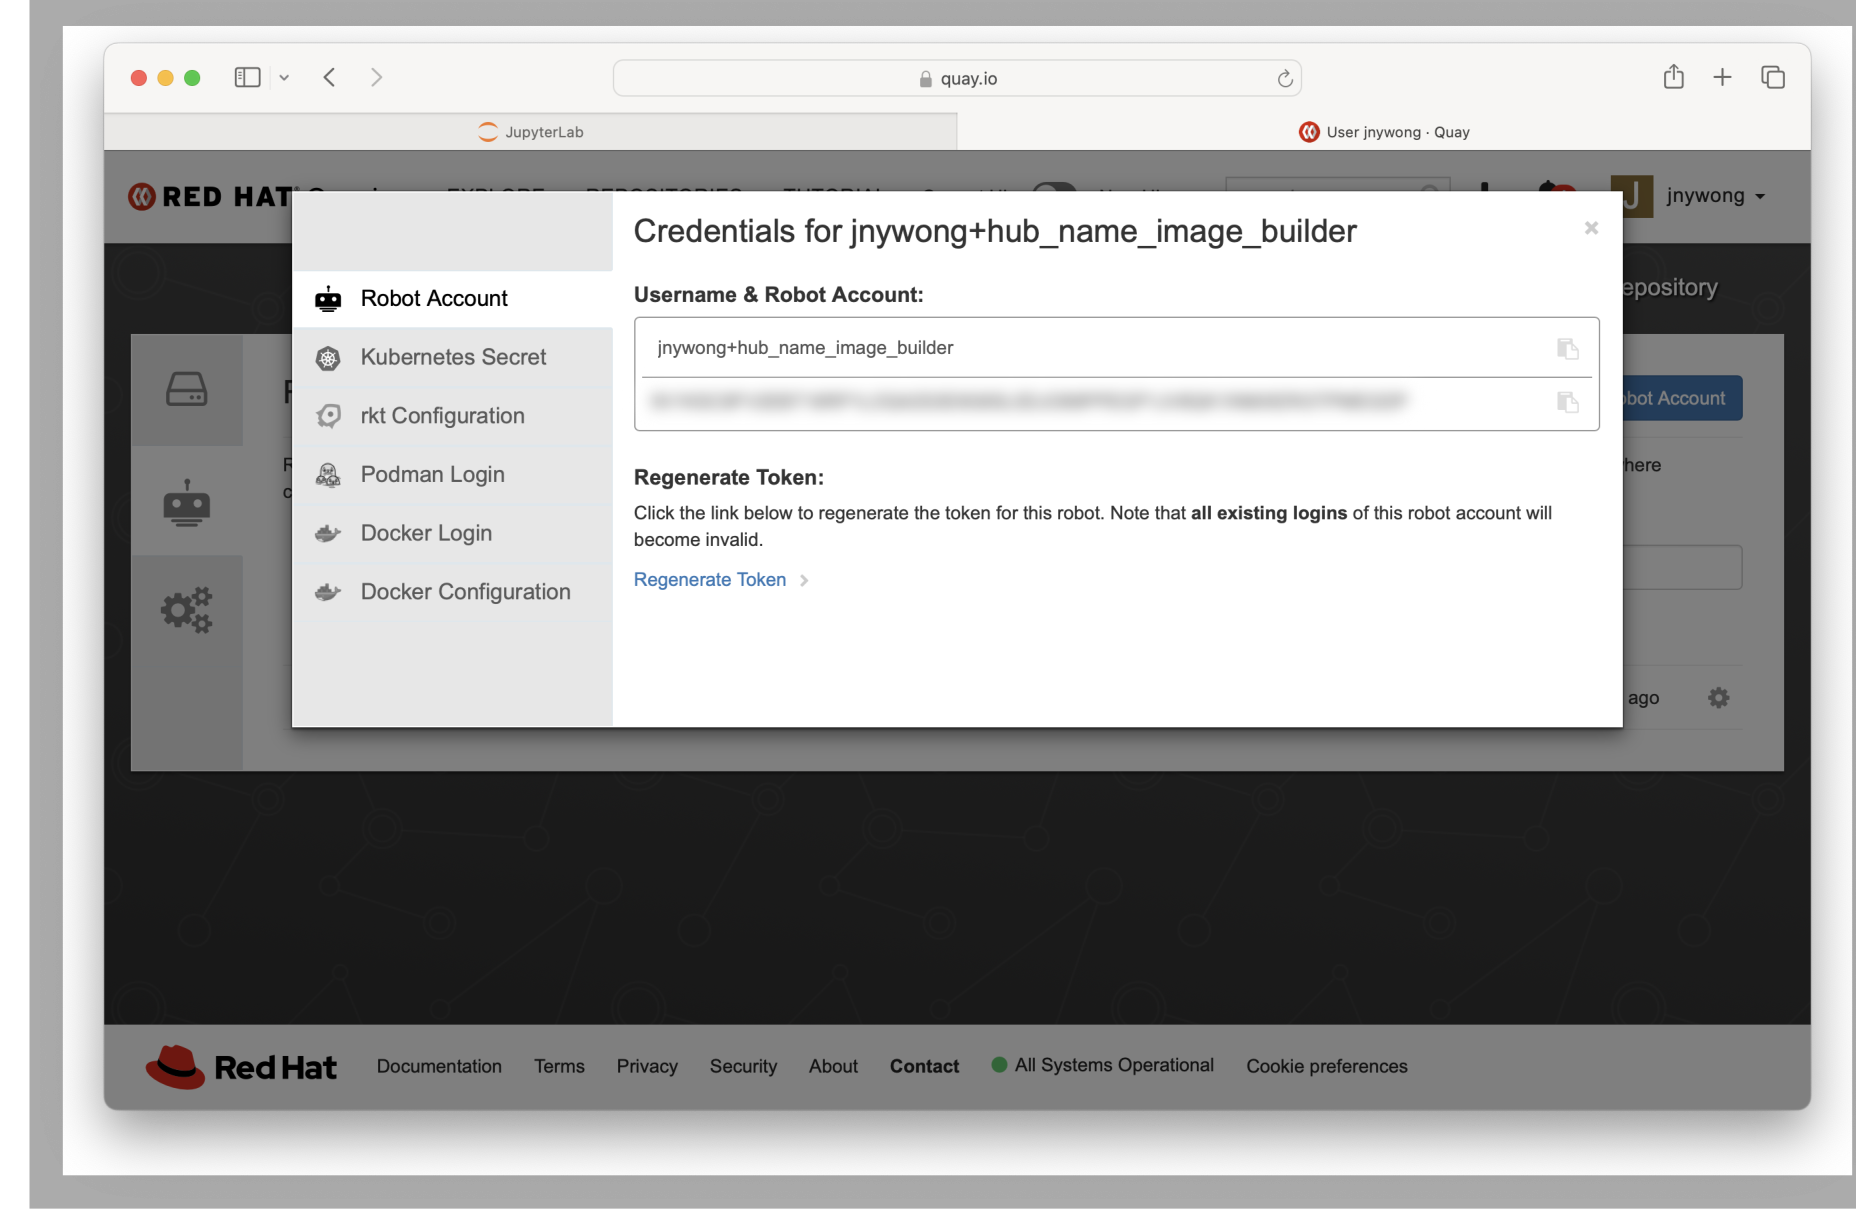
From quay.io, access your user settings by clicking your username in the top-right corner of the screen and selecting User settings.
Click the Robot icon from the left column.
Click the Create Robot Account button.
Name your robot, e.g.
<hub_name>_image_builderand then check the box next to the repository name that you created in Set up GitHub repository and connect it to quay.io, e.g.jupyter-scipy-xarray. From the dropdown, select the Write permission and then confirm by clicking Add permissions.Click the Robot Account name to view its credentials, e.g.
Username: <username>+_<hub_name>_image_builder
Password: <64 character authorization token>.
Create GitHub secrets#
The following summarizes Using secrets in GitHub Actions of the GitHub documentation.
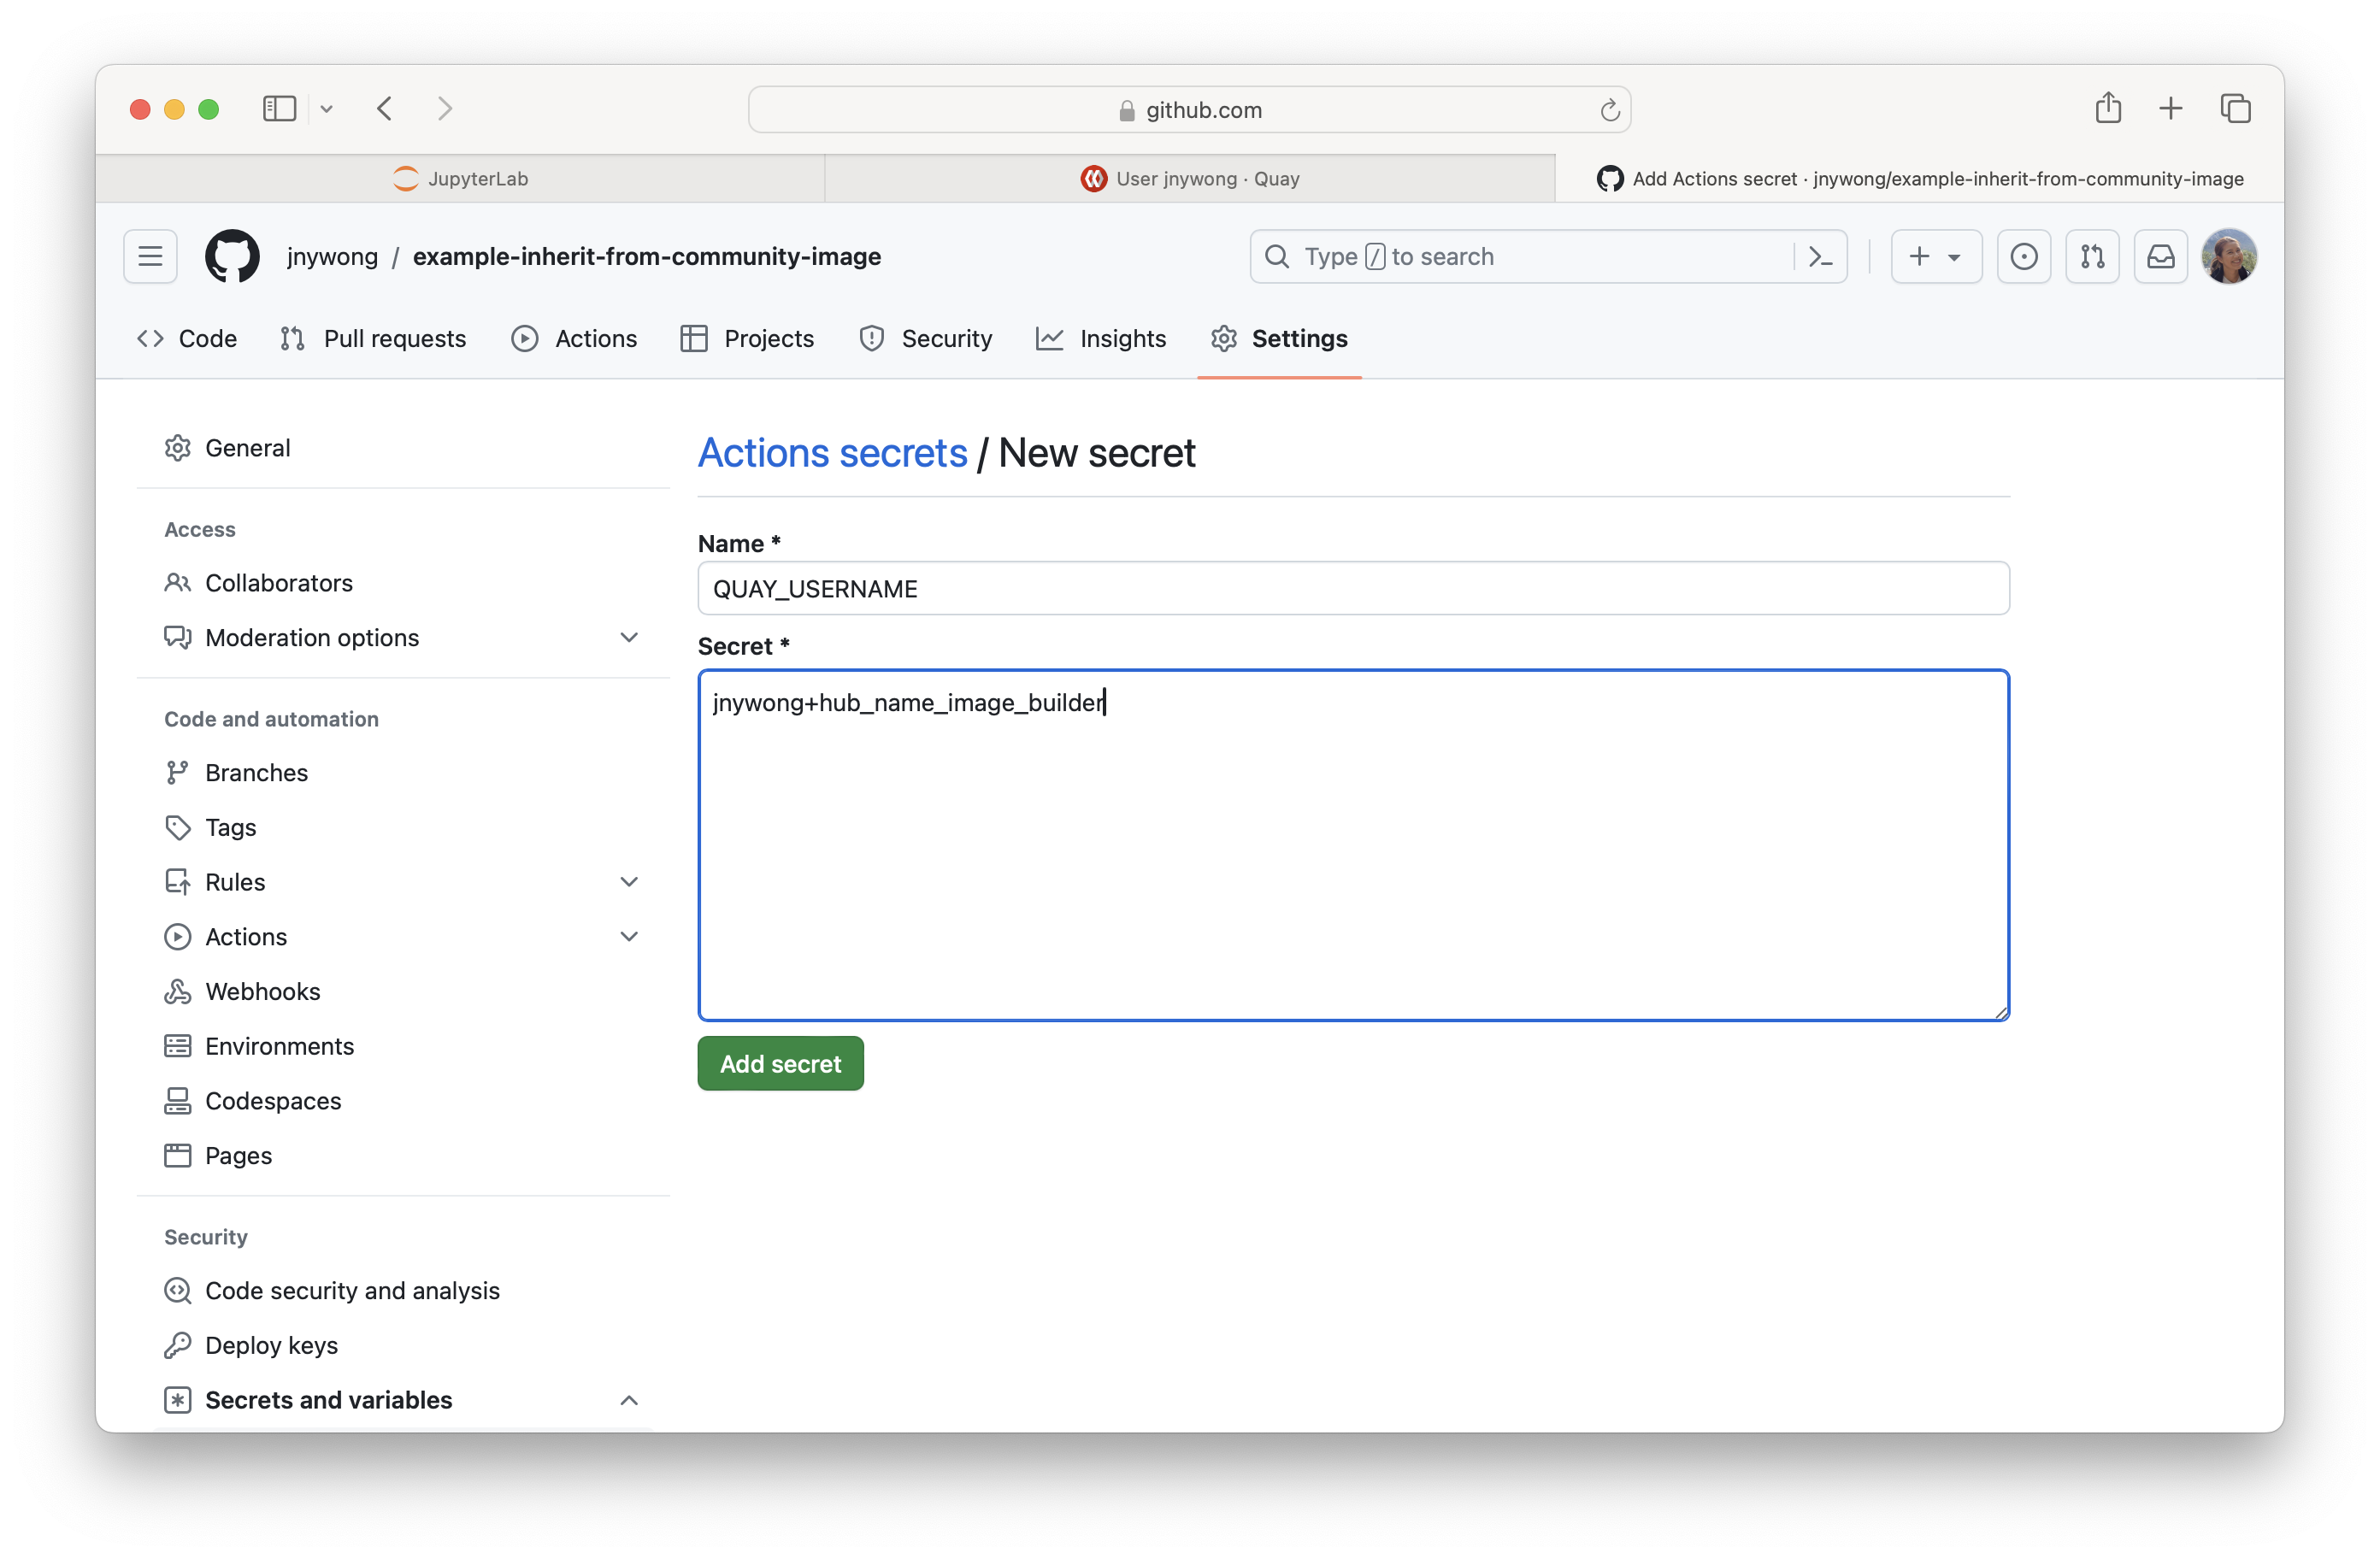
From the fork of your GitHub repository, click Settings > Secrets and variables > Actions
Under the section Repository secrets, click the New repository secret button
Create two new repository secrets
Name:
QUAY_USERNAMEand then paste the Robot account username from above into SecretName:
QUAY_PASSWORDand then paste the Robot account password from above into Secret
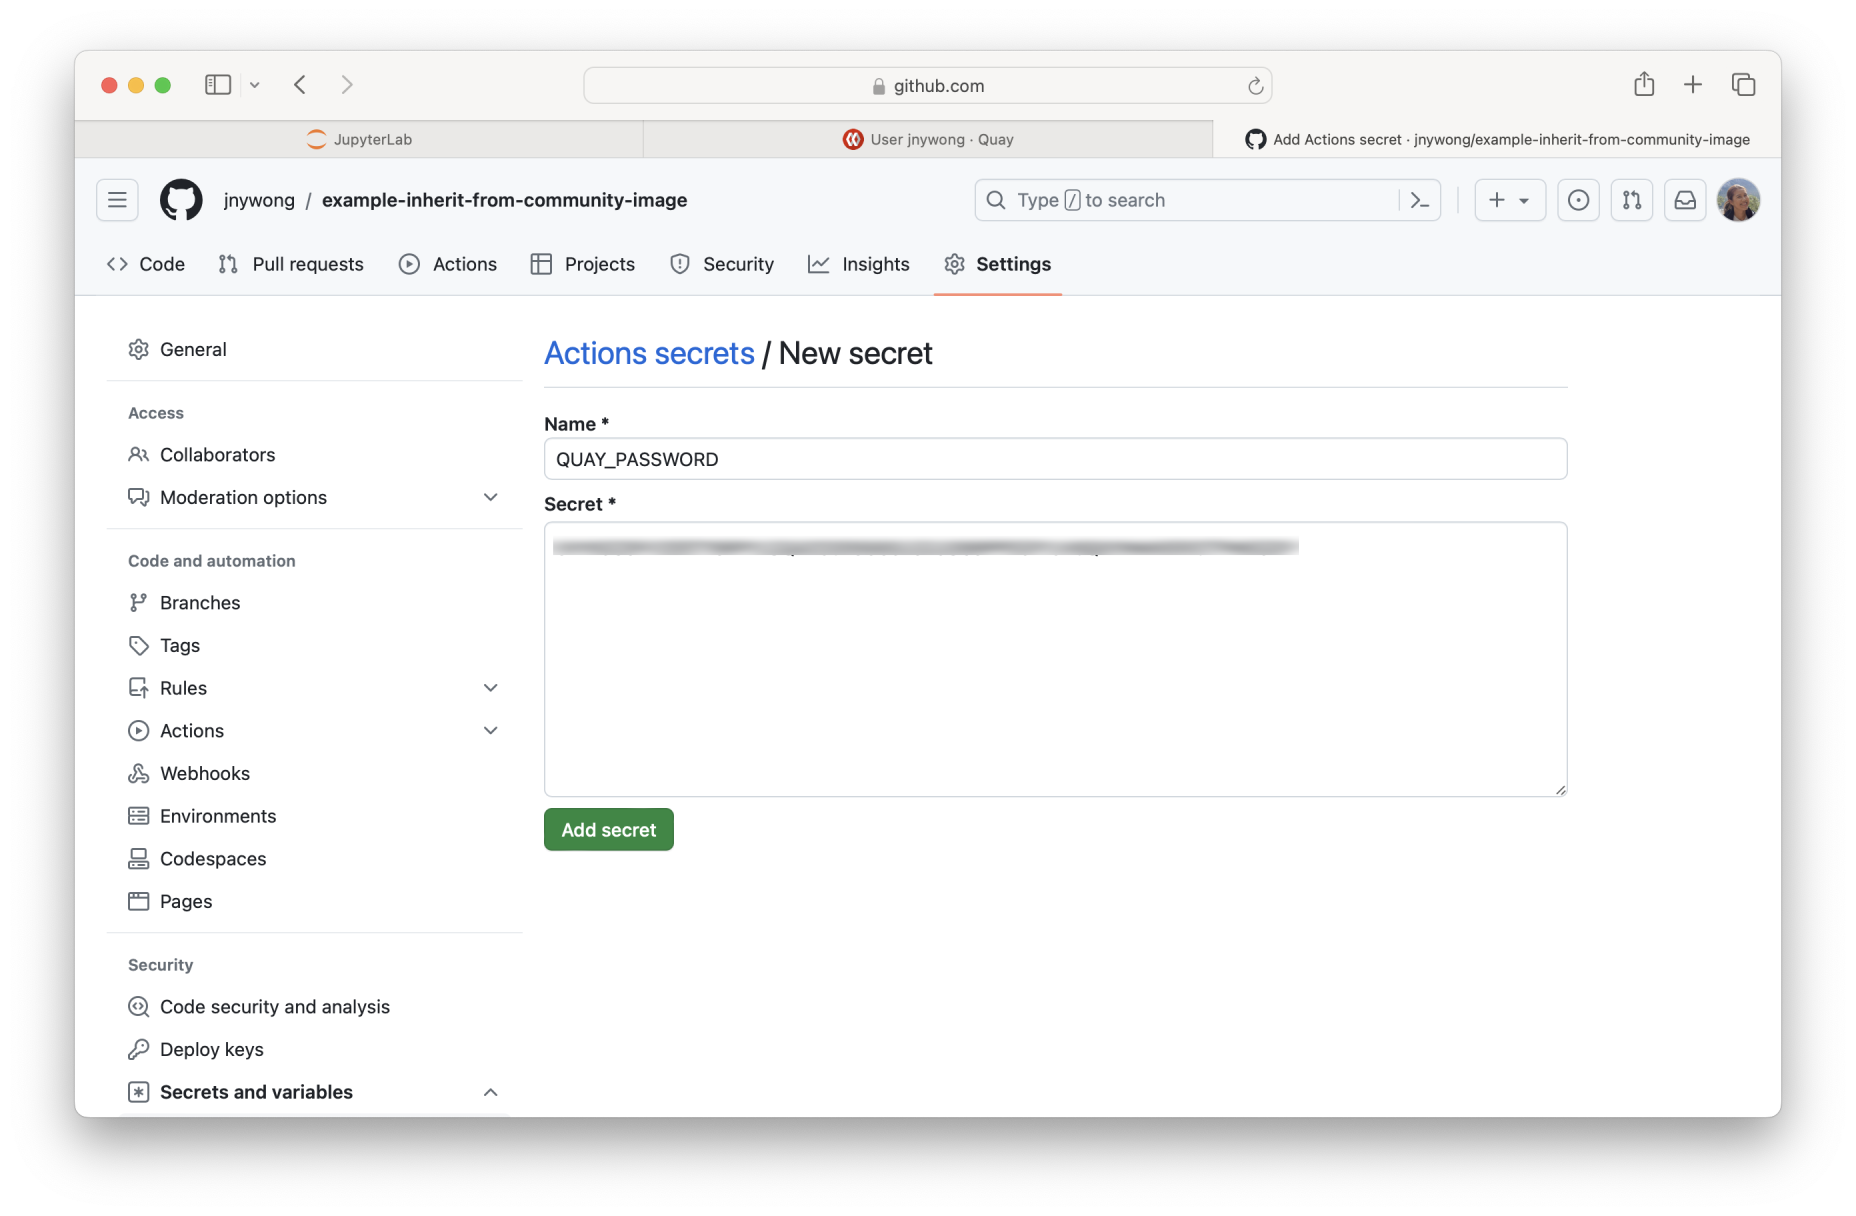
Once complete, under the section Repository secrets you should now see two rows for QUAY_USERNAME and QUAY_PASSWORD.
Enable GitHub workflows#
From the fork of your GitHub repository, click Actions.
Enable GitHub workflows by clicking I understand my workflows, go ahead and enable them.
Edit GitHub repository files to customize your image#
Log into your hub to start a small server with the image you wish to update.
Click the
 Git icon in the left sidebar to open the JupyterLab Git extension.
Clone the forked repository from Set up the GitHub repository and connect it to quay.io into the hub by the clicking Clone a Repository button followed by entering the URL of the remote Git repository, e.g.
https://github.com/<username>/example-inherit-from-community-image.git.Change the working directory by double-clicking example-inherit-from-community-image in the file explorer on the left side of the screen.
Build base image#
Update the GitHub workflow files with your quay.io repository
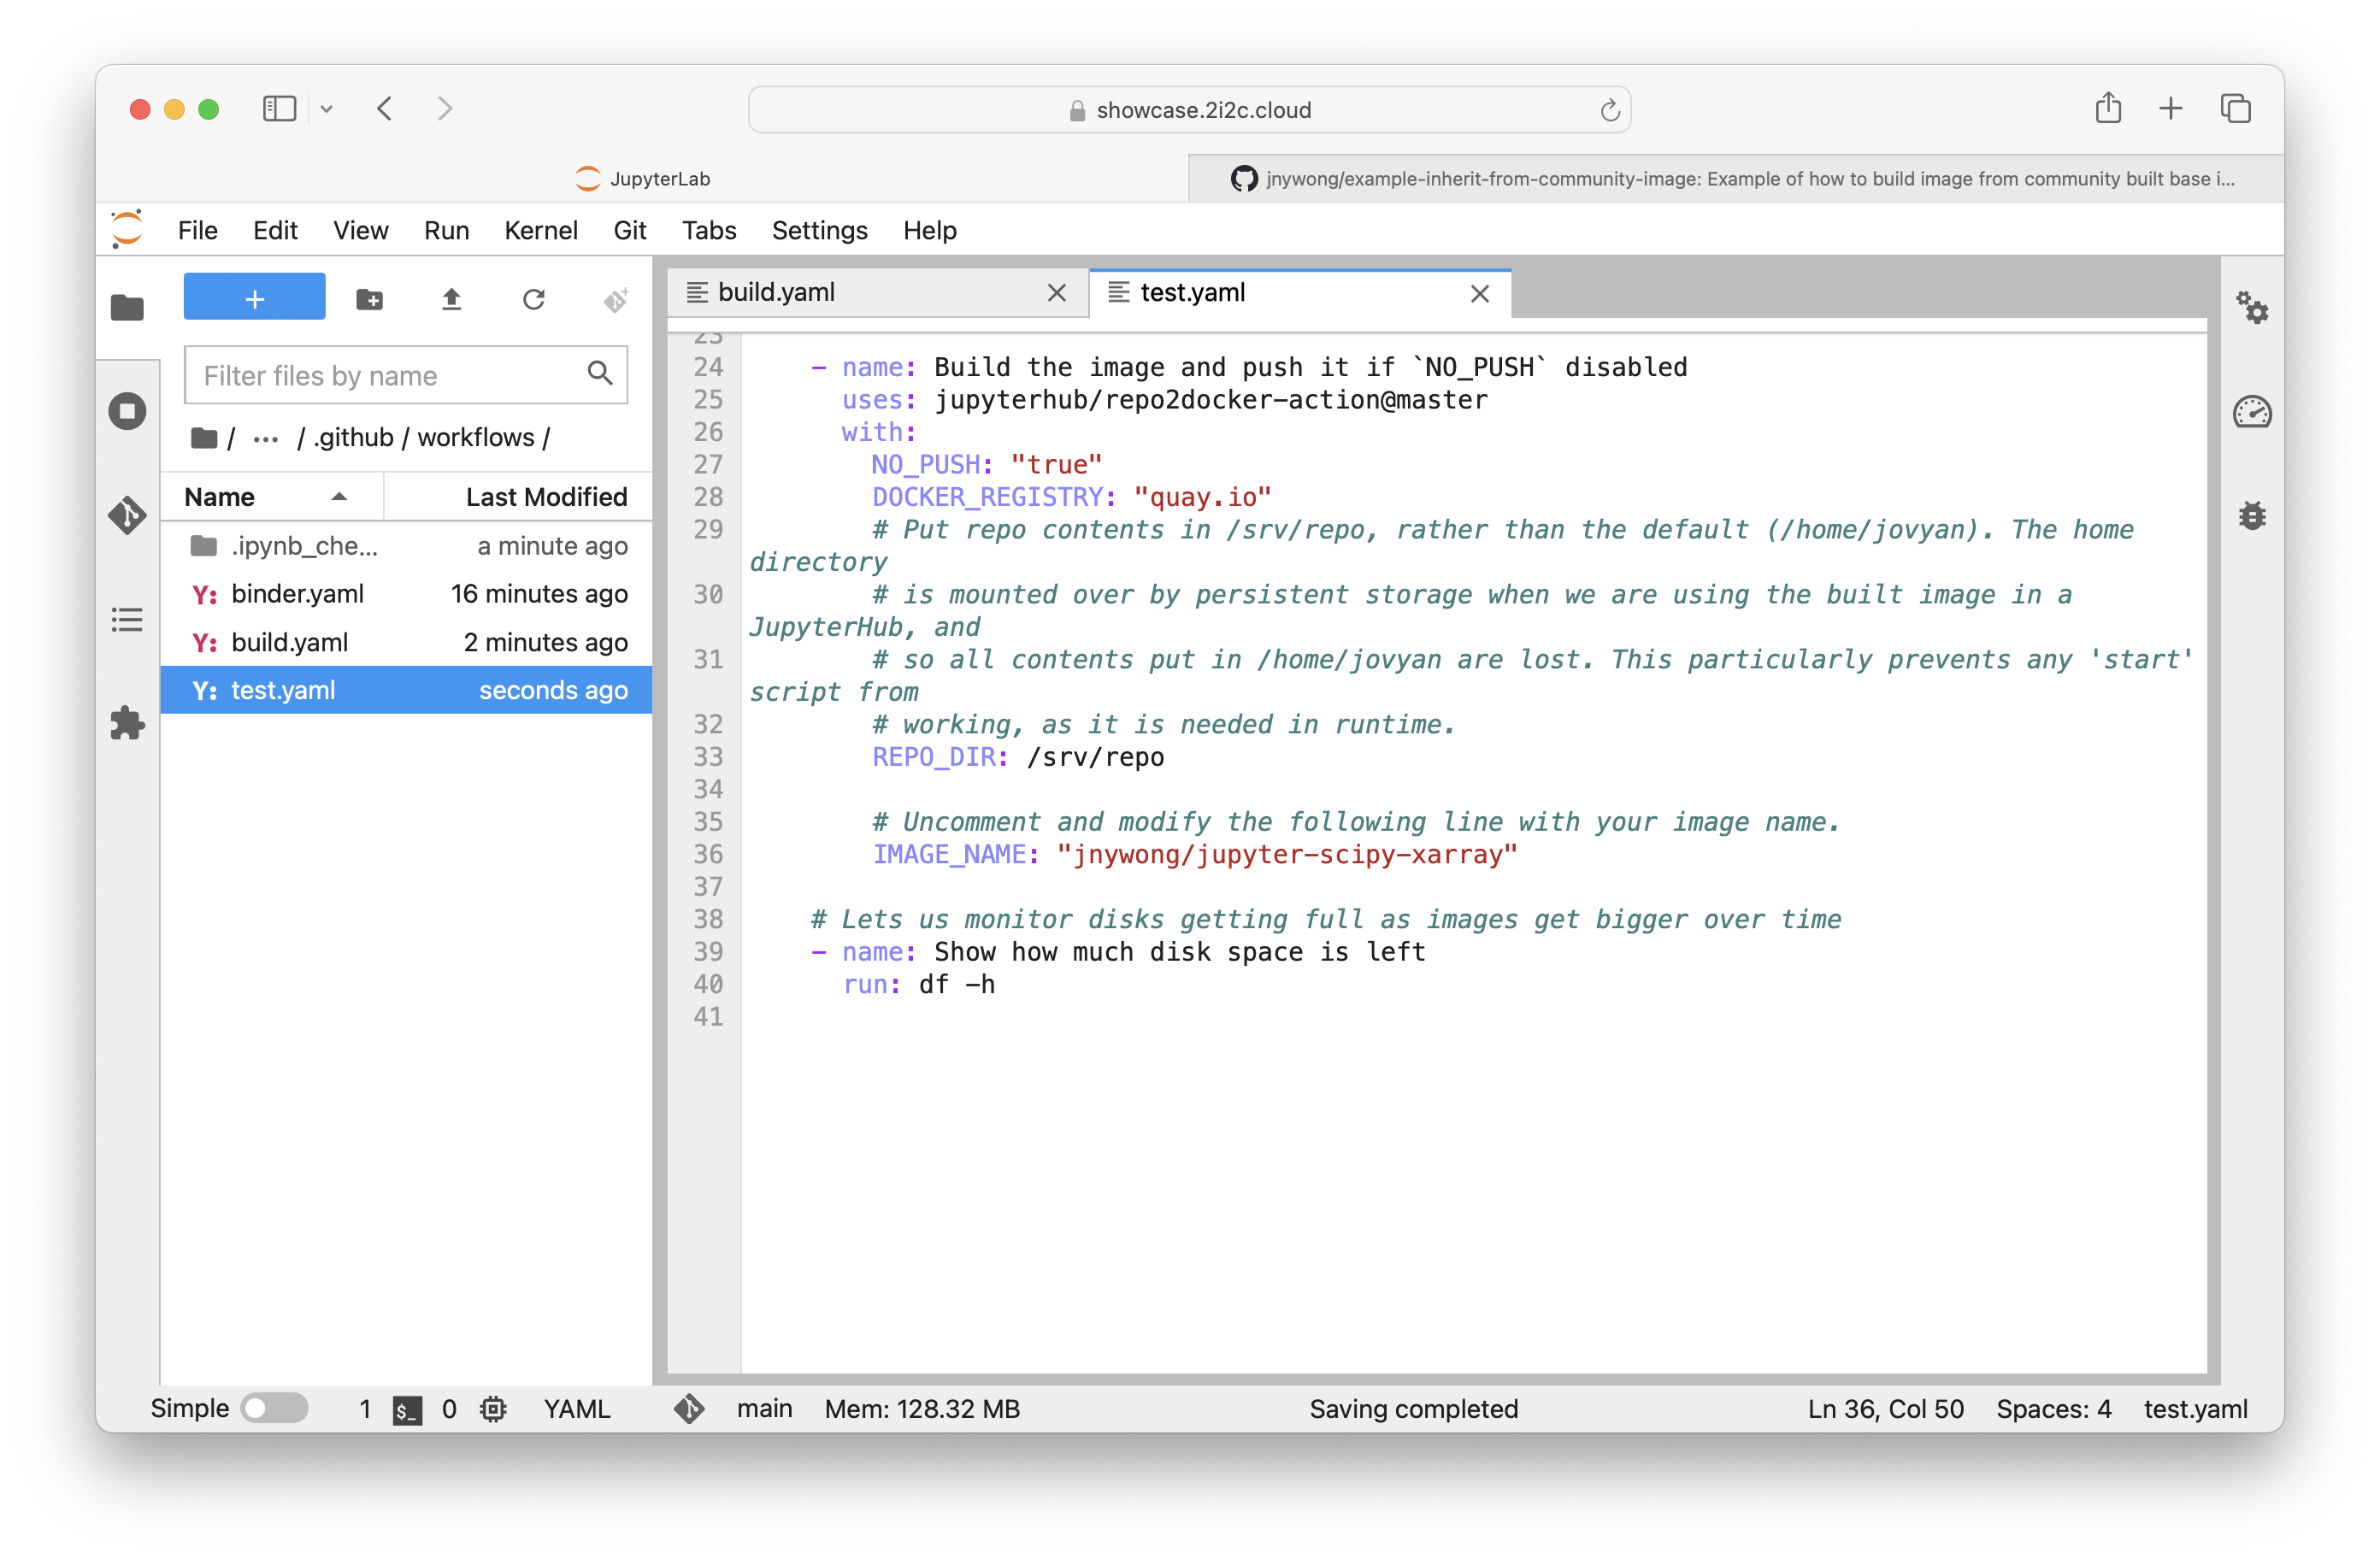
Open .github/workflows/build.yaml and update
IMAGE_NAMEwith<username>/jupyter-scipy-xarrayOpen .github/workflows/test.yaml and update
IMAGE_NAMEwith<username>/jupyter-scipy-xarray
From the
JupyterLab Git extension, stage your changes to .github/workflows/build.yaml and .github/workflows/test.yaml by clicking the plus symbol next to the filenames under the Changed section.At the bottom of the panel enter a summary message, e.g. Update IMAGE_NAME to <username>/jupyter-scipy-xarray, then commit your changes
Push your changes to the remote repository by clicking the Git push icon at the top of the panel.
Move code in and out of the hub with GitHub
If you see the following dialog box,

then we recommend you press Cancel and securely authenicate using
gh-scoped-creds. See the 2i2c Docs – Move code in and out of the hub with GitHub for more information.This triggers the repo2docker-action to build the base image and push this to the quay.io repository. The build process can take a few minutes. You can view the status of the build by visiting the Actions tab at
https://github.com/<username>/example-inherit-from-community-image.When the build has finished, you can check your image hosted on quay.io by navigating to a URL of the form
https://quay.io/repository/<username>/<quay-repo-name>, e.g. https://quay.io/repository/jnywong/jupyter-scipy-xarray.
Update the base image#
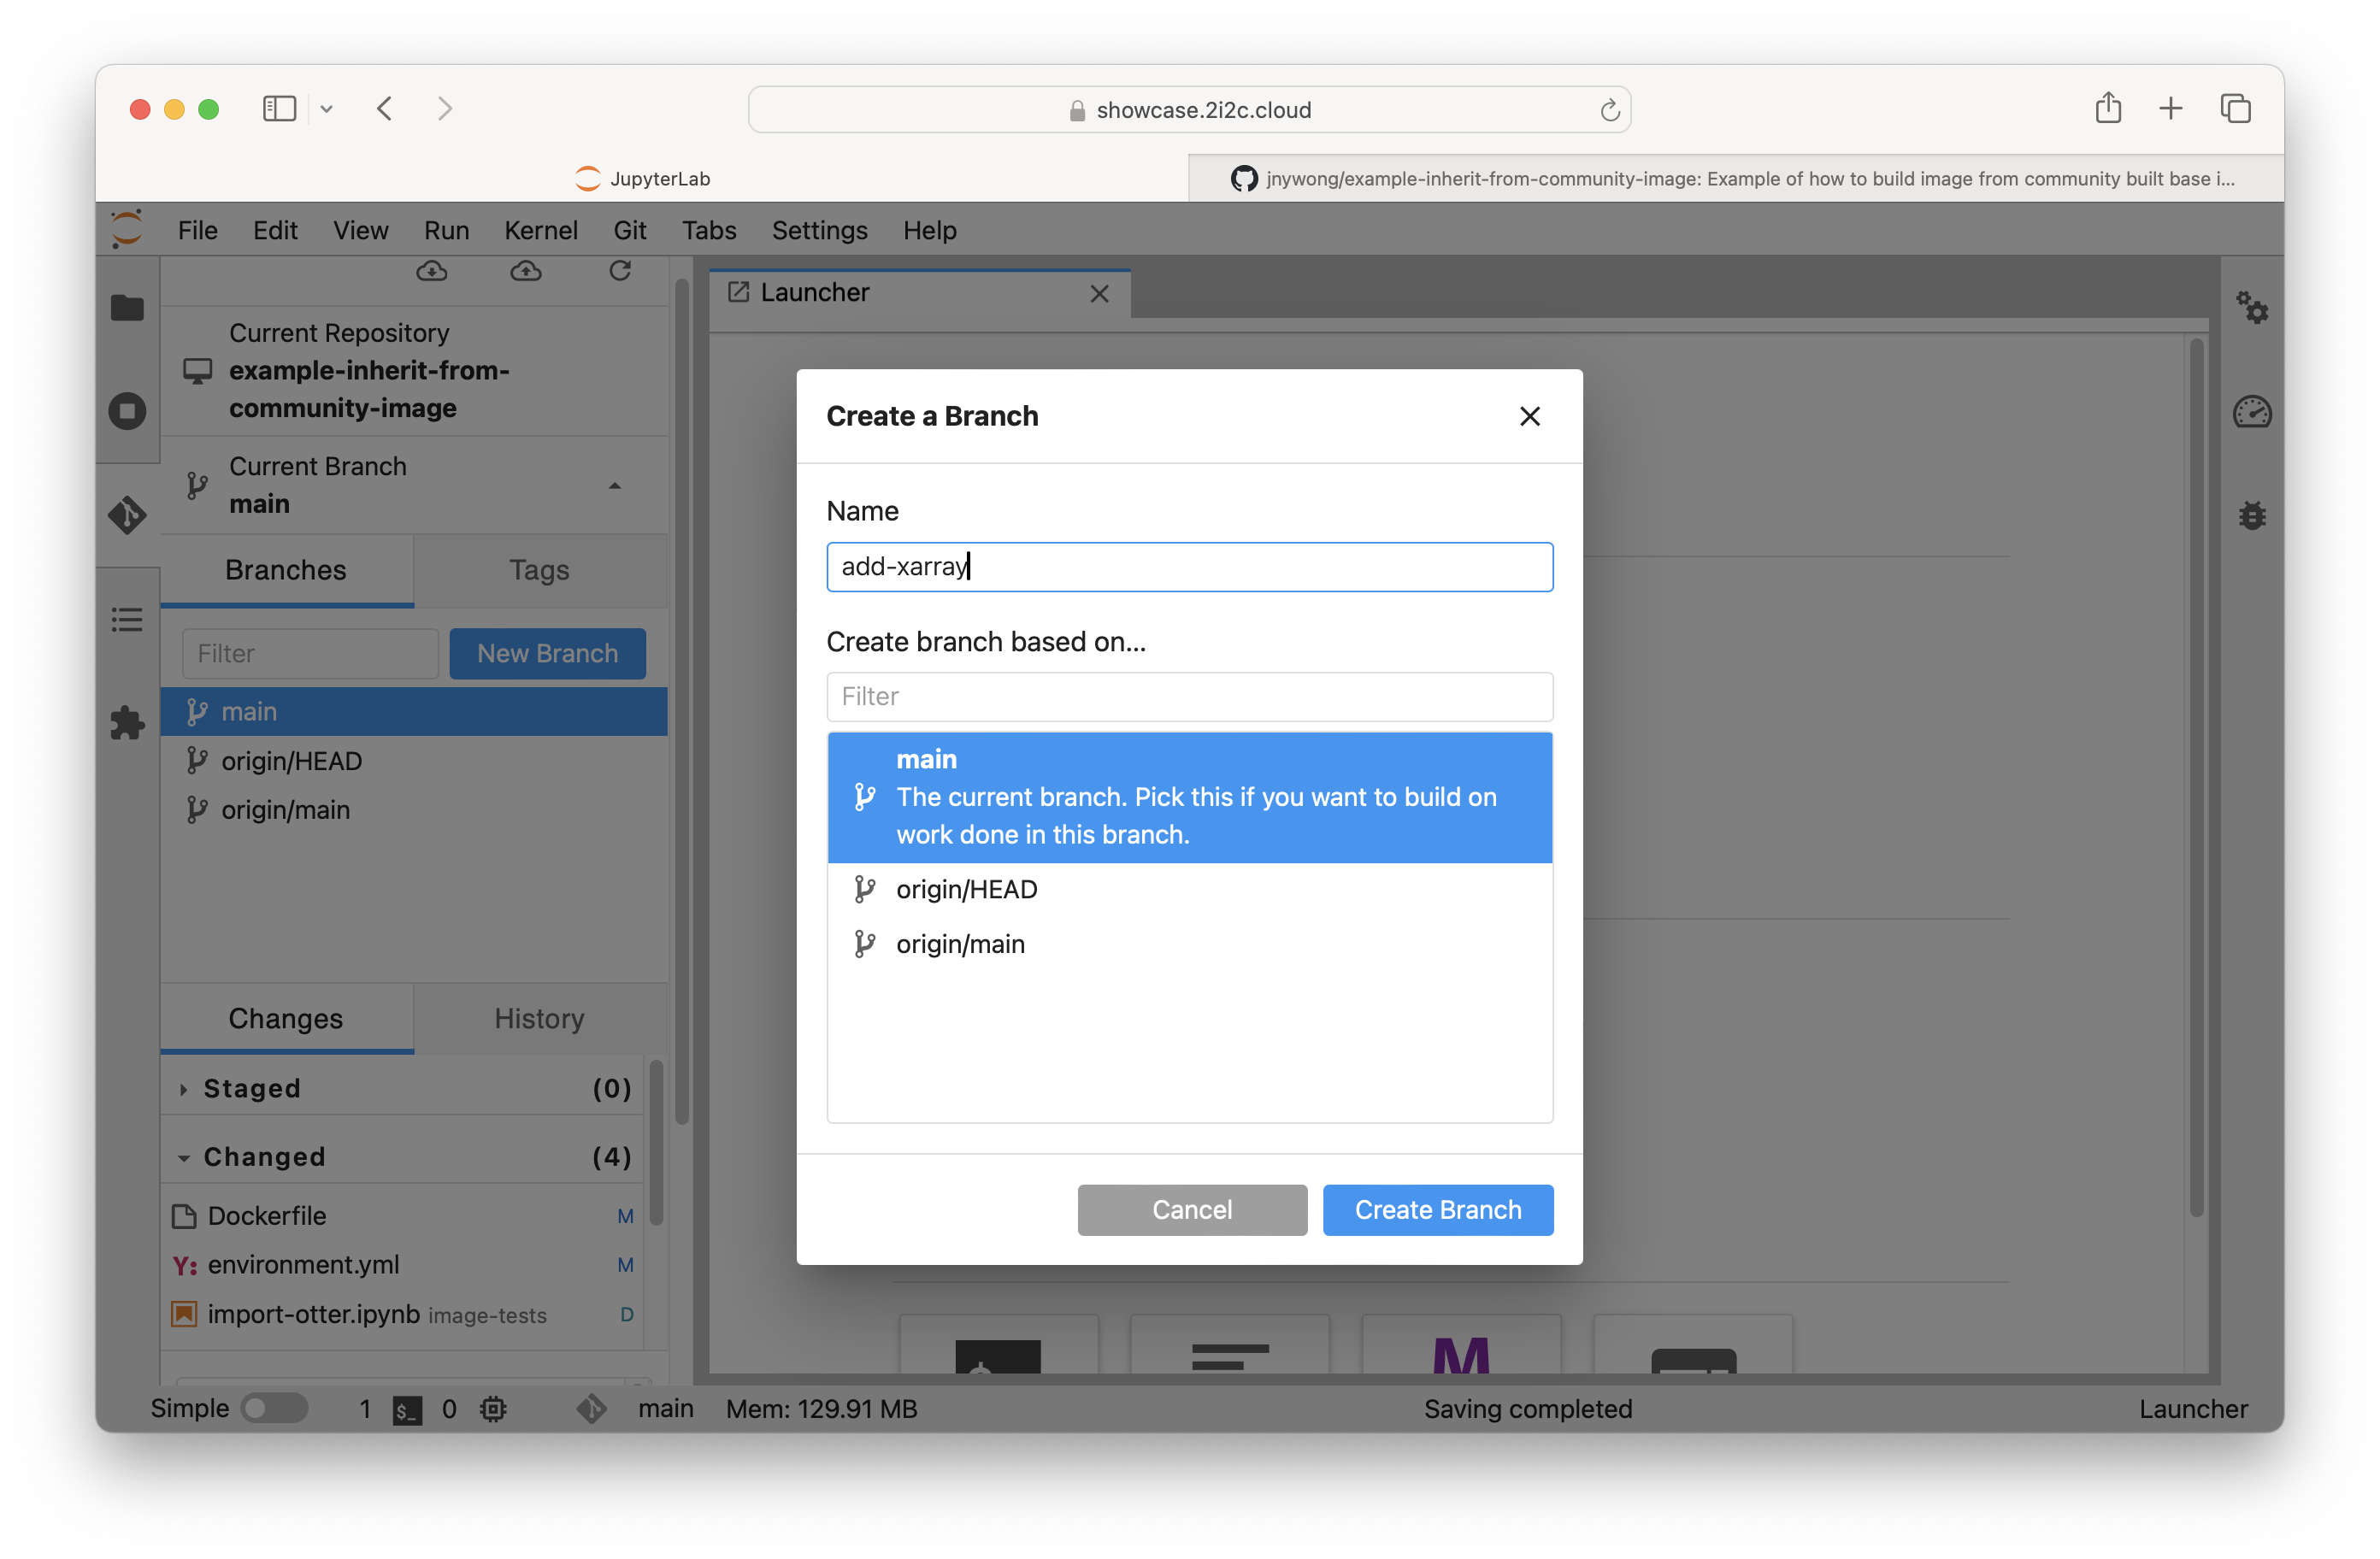
From the
JupyterLab Git extension, expand the Current Branch dropdown and click the New Branch buttonName your branch, e.g. add-xarray
Select main for the Create branch based on… option.
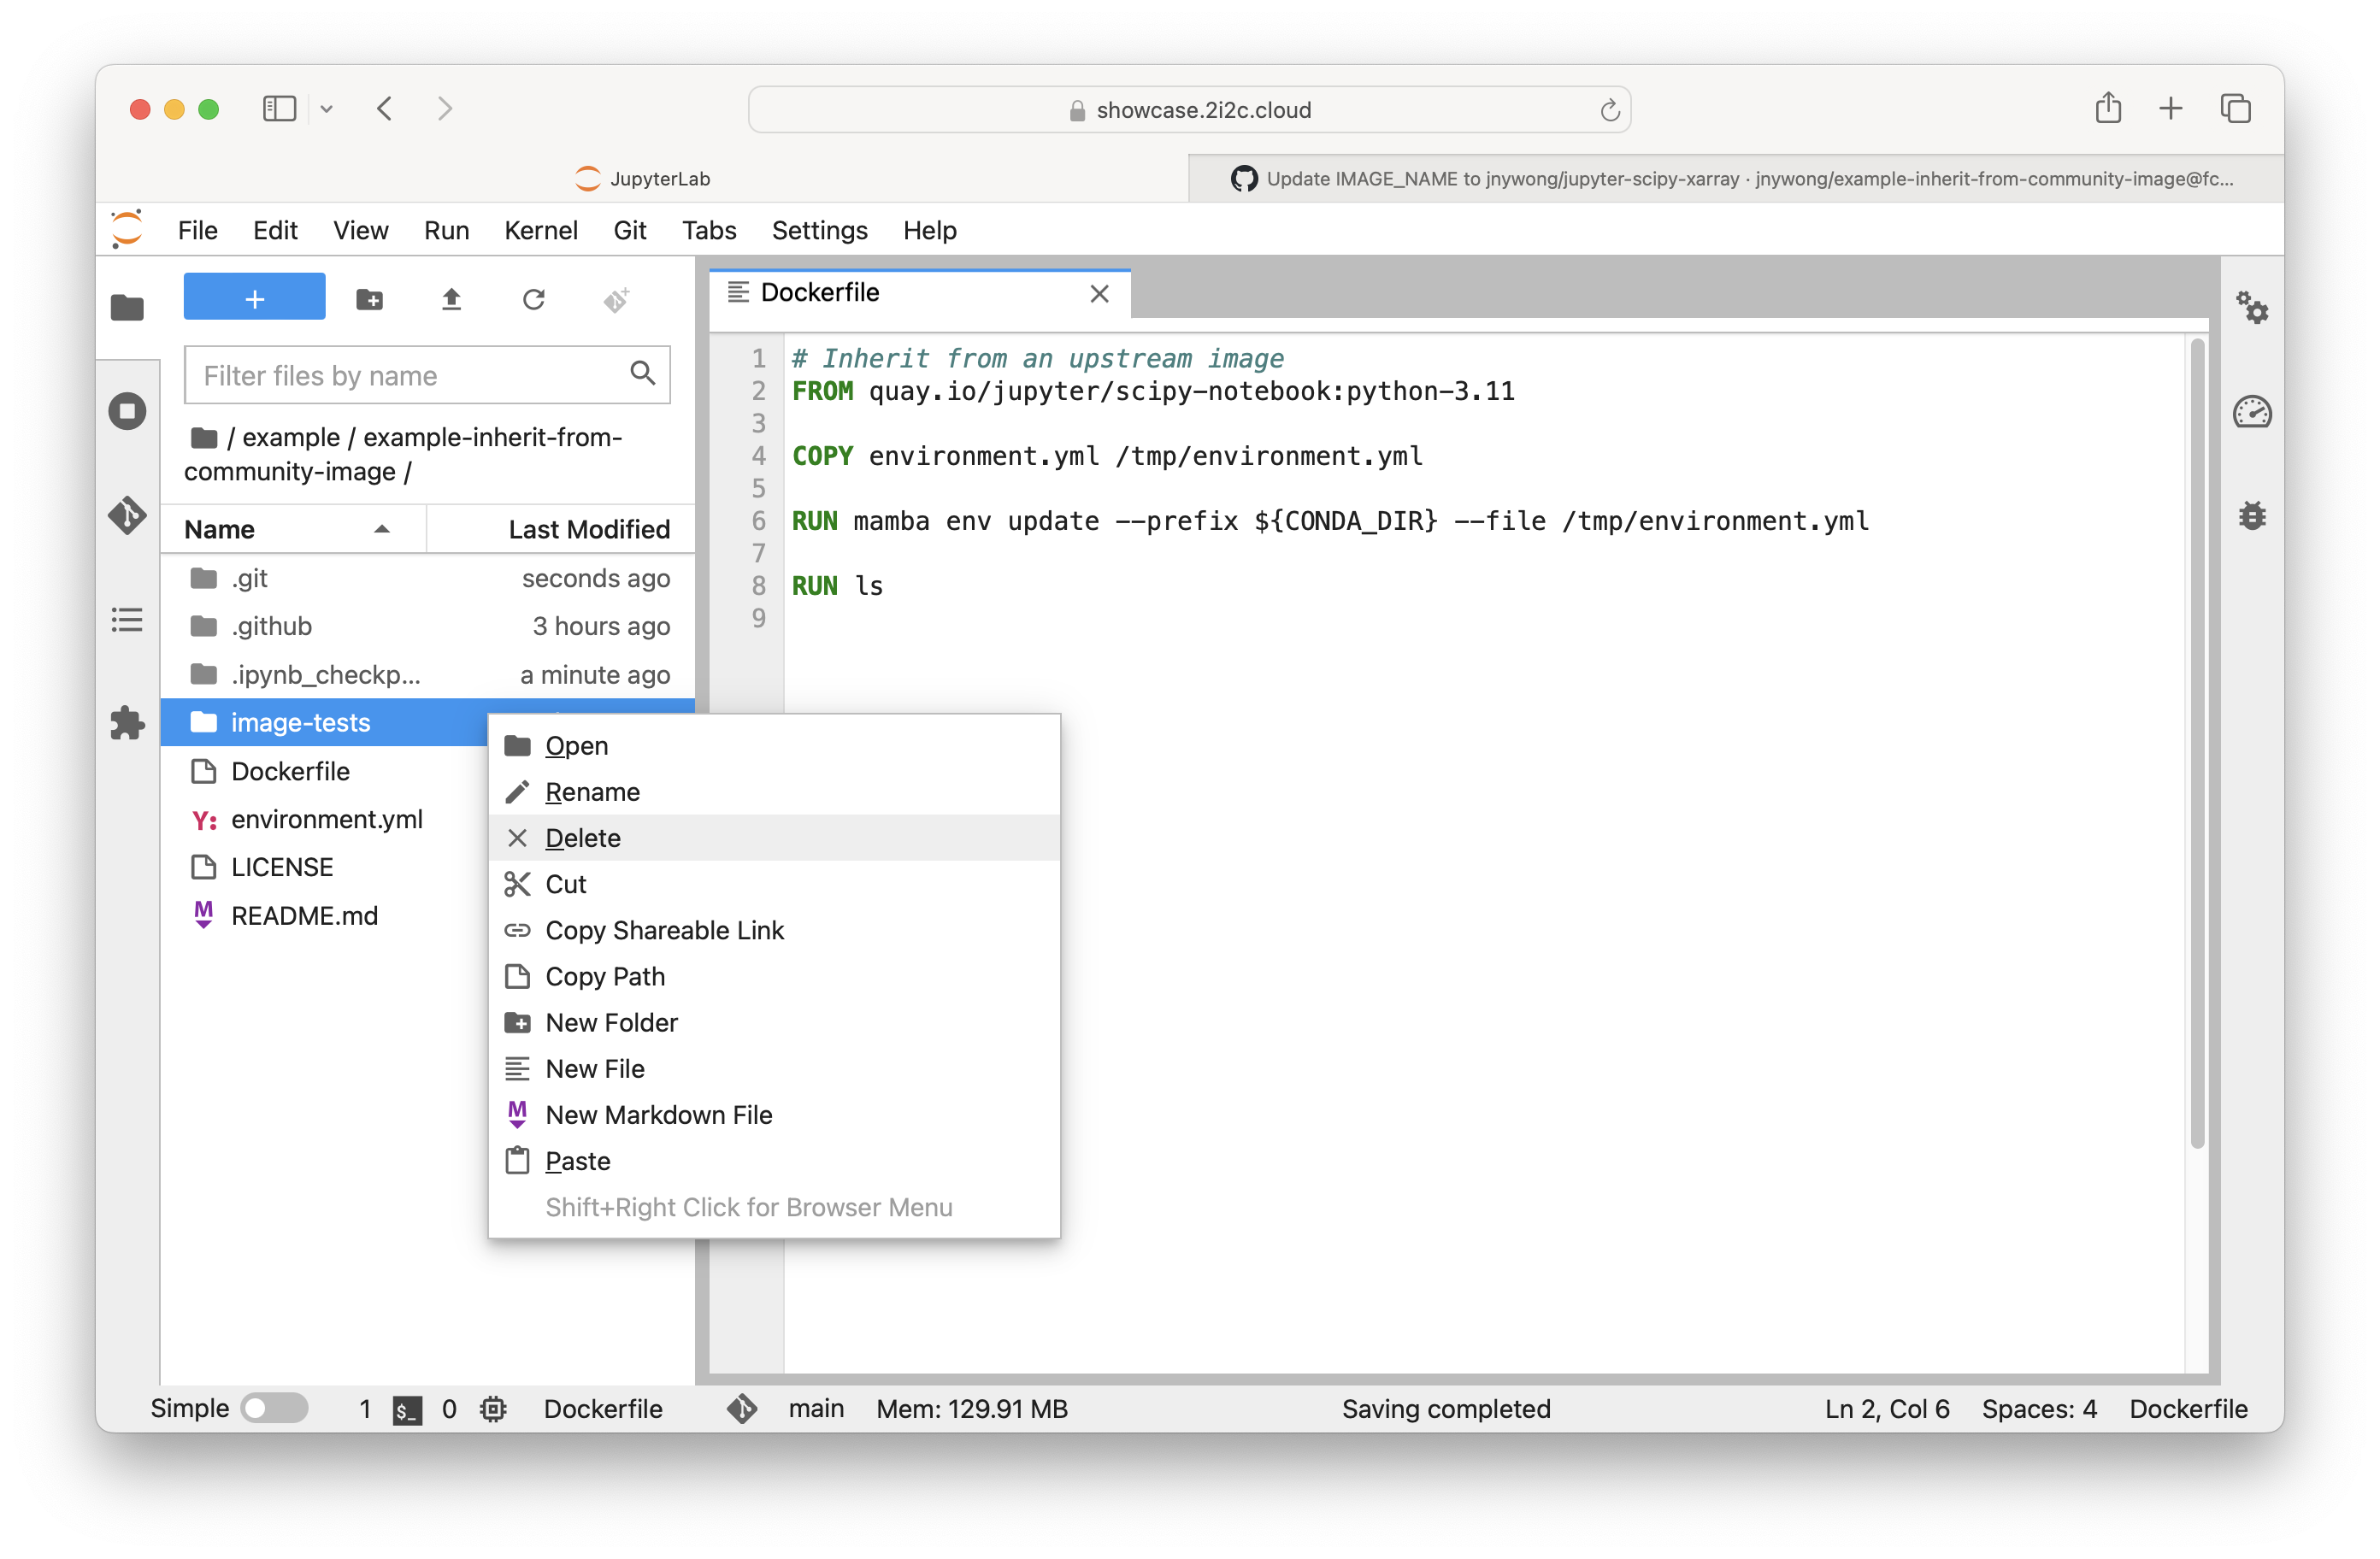
Edit the Dockerfile
Update the
FROMinstruction with the base image you require, e.g.quay.io/jupyter/scipy-notebook:python-3.11For now, remove the tests by deleting the
COPYinstruction and deleting theimage-testsfolder in the file explorer.
Add packages to the Conda environment#
Edit environment.yml
Specify the Python version required, e.g.
python=3.11Add the extra package(s) to install, e.g.
xarray.
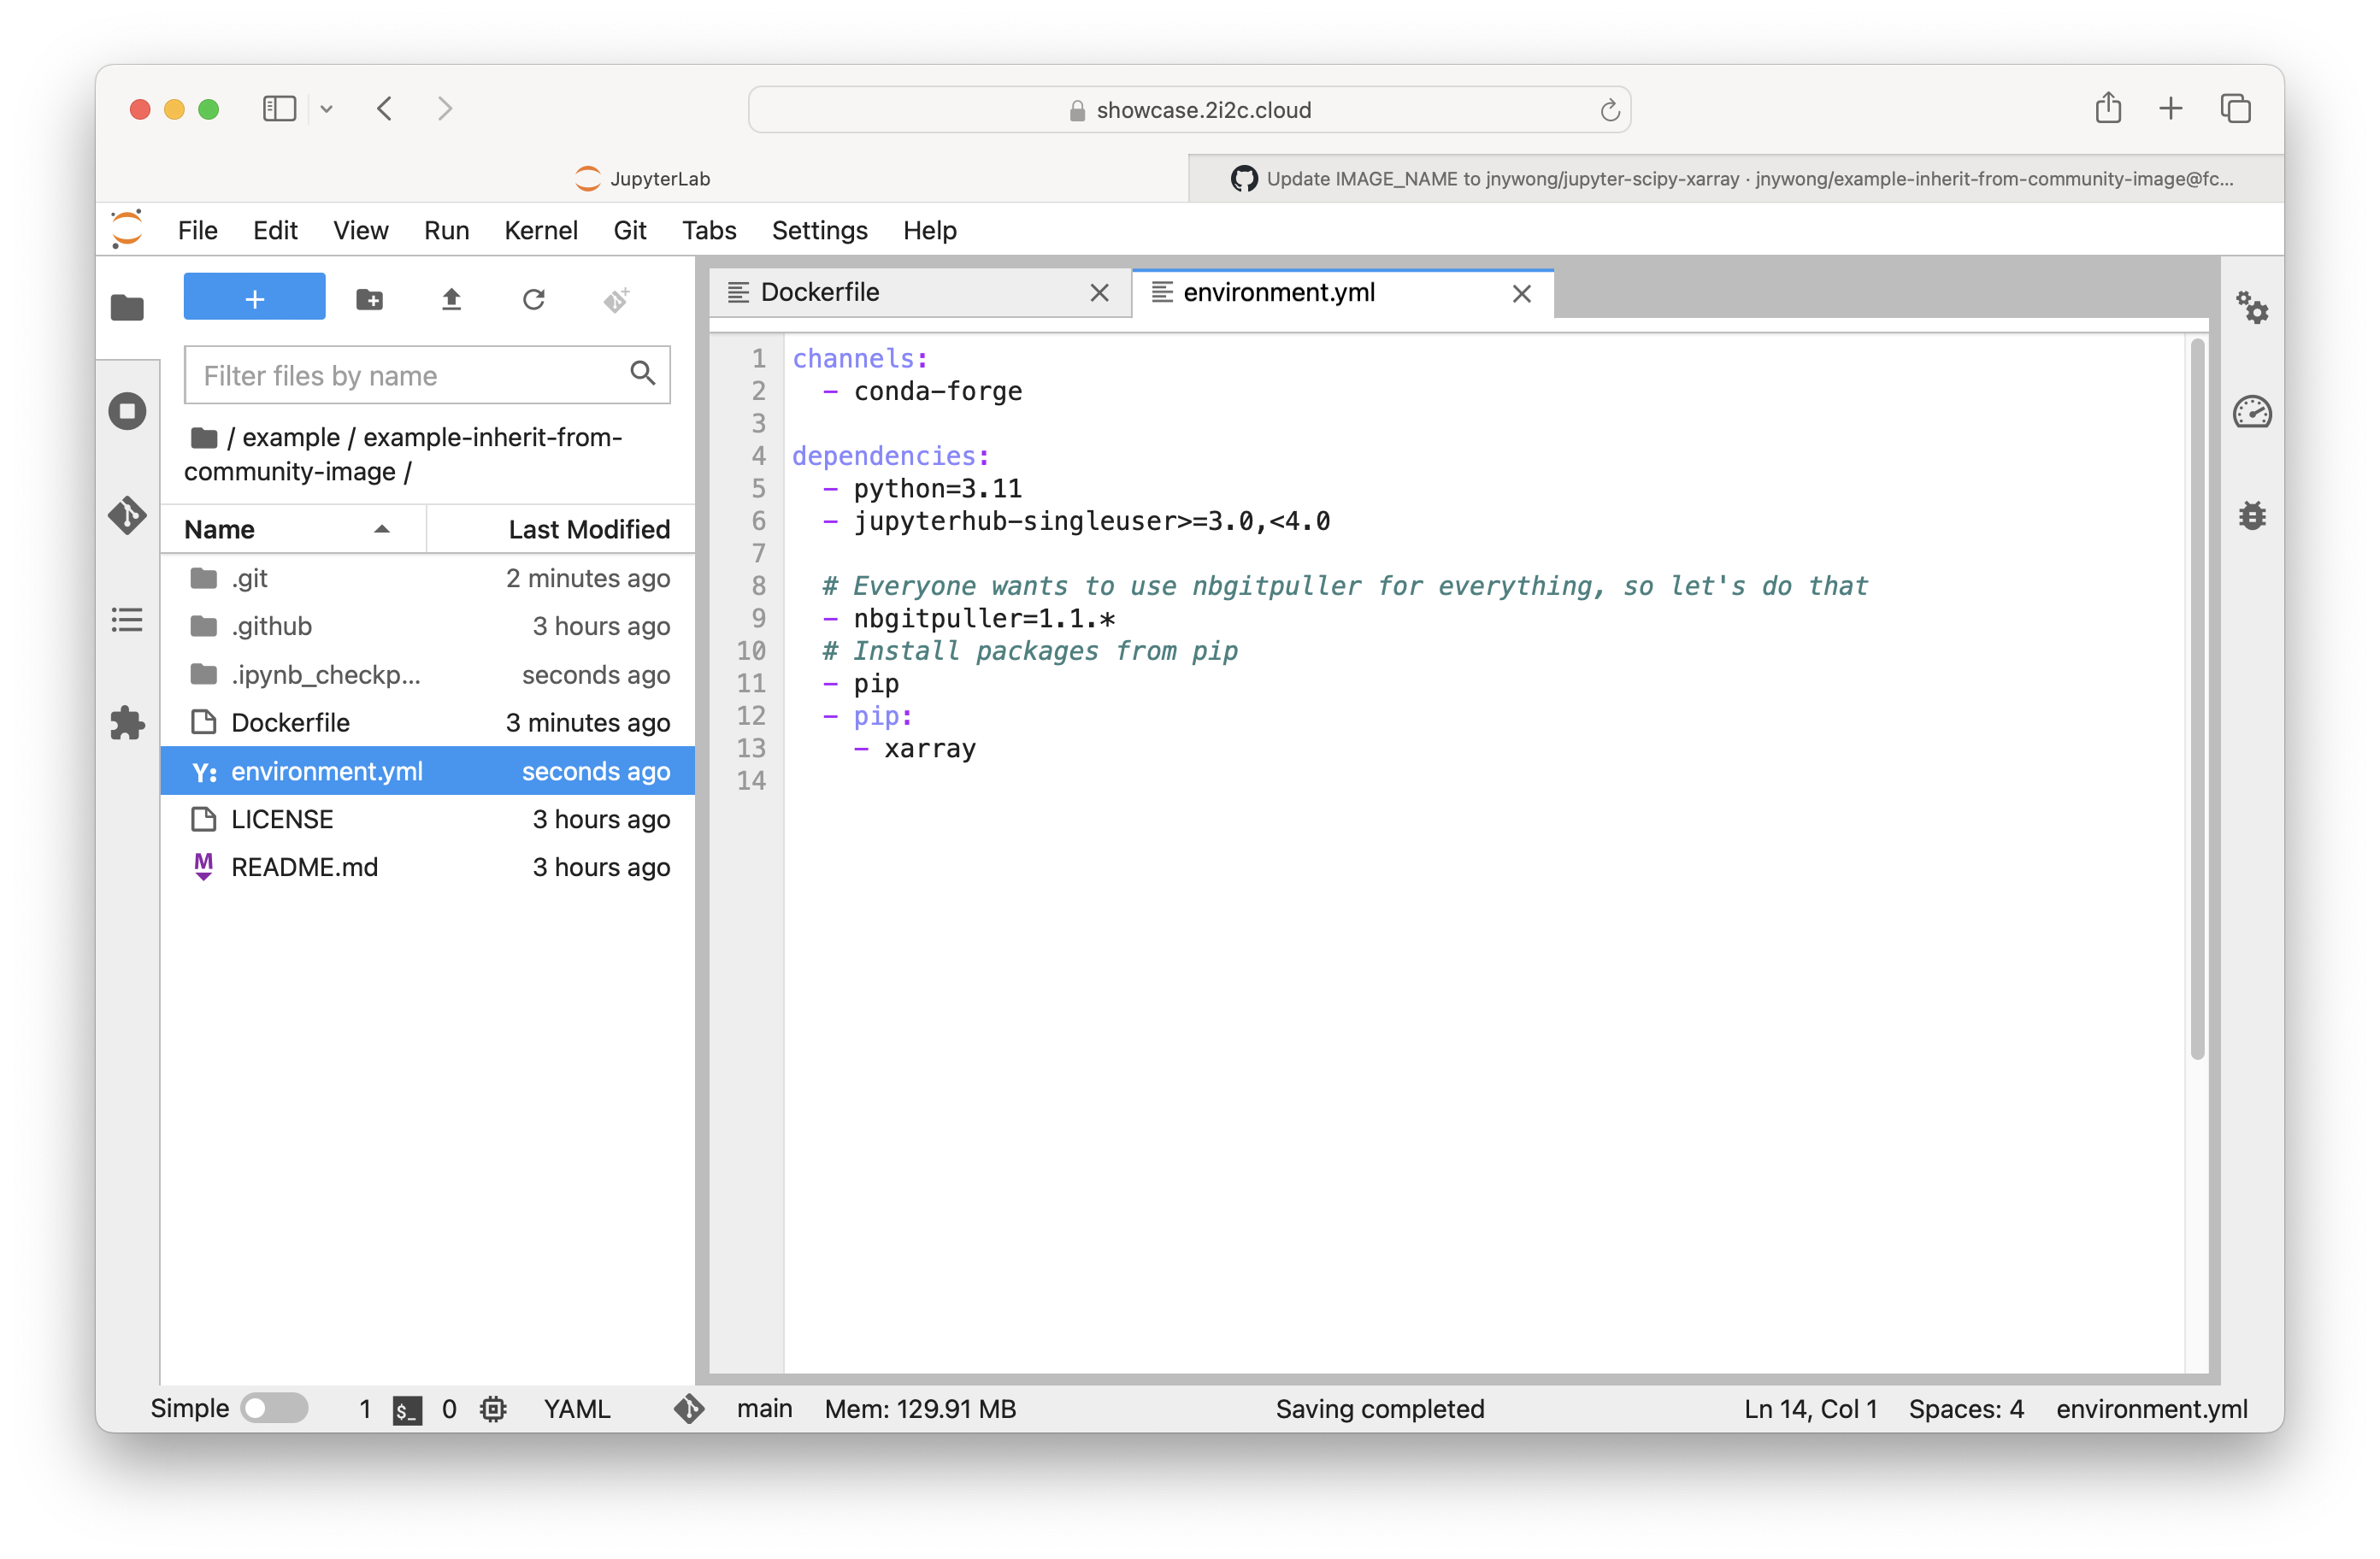
See the repo2docker documentation for more details on how to configure your environment.
Trigger build and test the custom image#
Stage, commit and push your changes by following the similar steps in Section Build base image.
Visit your GitHub repository at
https://github.com/<username>/example-inherit-from-community-imageand click the Compare & pull request button.Open a pull request and double-check that the target branch is <username>:main (this usually defaults to the upstream repo).

Click Create pull request to confirm, which triggers the repo2docker-action to build and push your image to the quay.io registry.
When the GitHub actions have completed, it is important to test your image is working as expected by following either Test the custom image on a 2i2c hub or Test the custom image with Binder.
Test the custom image with a 2i2c hub#
When the GitHub actions have completed, you can check your image is updated on quay.io by navigating to a URL of the form
https://quay.io/repository/<username>/<quay-repo-name>, e.g. https://quay.io/repository/jnywong/jupyter-scipy-xarray, and then clicking on the Tags sub-menu to view a list of image versions. The full image tag is of the form<registry>/<username>/<repo_name>:<git-commit-hash>
e.g.
quay.io/jnywong/jupyter-scipy-xarray:739fec9705b1, which you need to provide in the Section Link custom image to your hub.Navigate to your 2i2c hub and paste the image tag into the Image > Custom Image > Other… field (see Specify your own custom image for the software environment).
Click start to launch the server and test your custom environment. You can continue editing the DockerFile and environment.yml, then push changes to the pull request as required.
Test the custom image with Binder#
When the GitHub actions have completed, a pull request comment from the github-actions bot will appear with a link. Click the launch binder button. The build process can take a few minutes.
Once complete, Binder launches into a preview of your custom container hosted at mybinder.org.
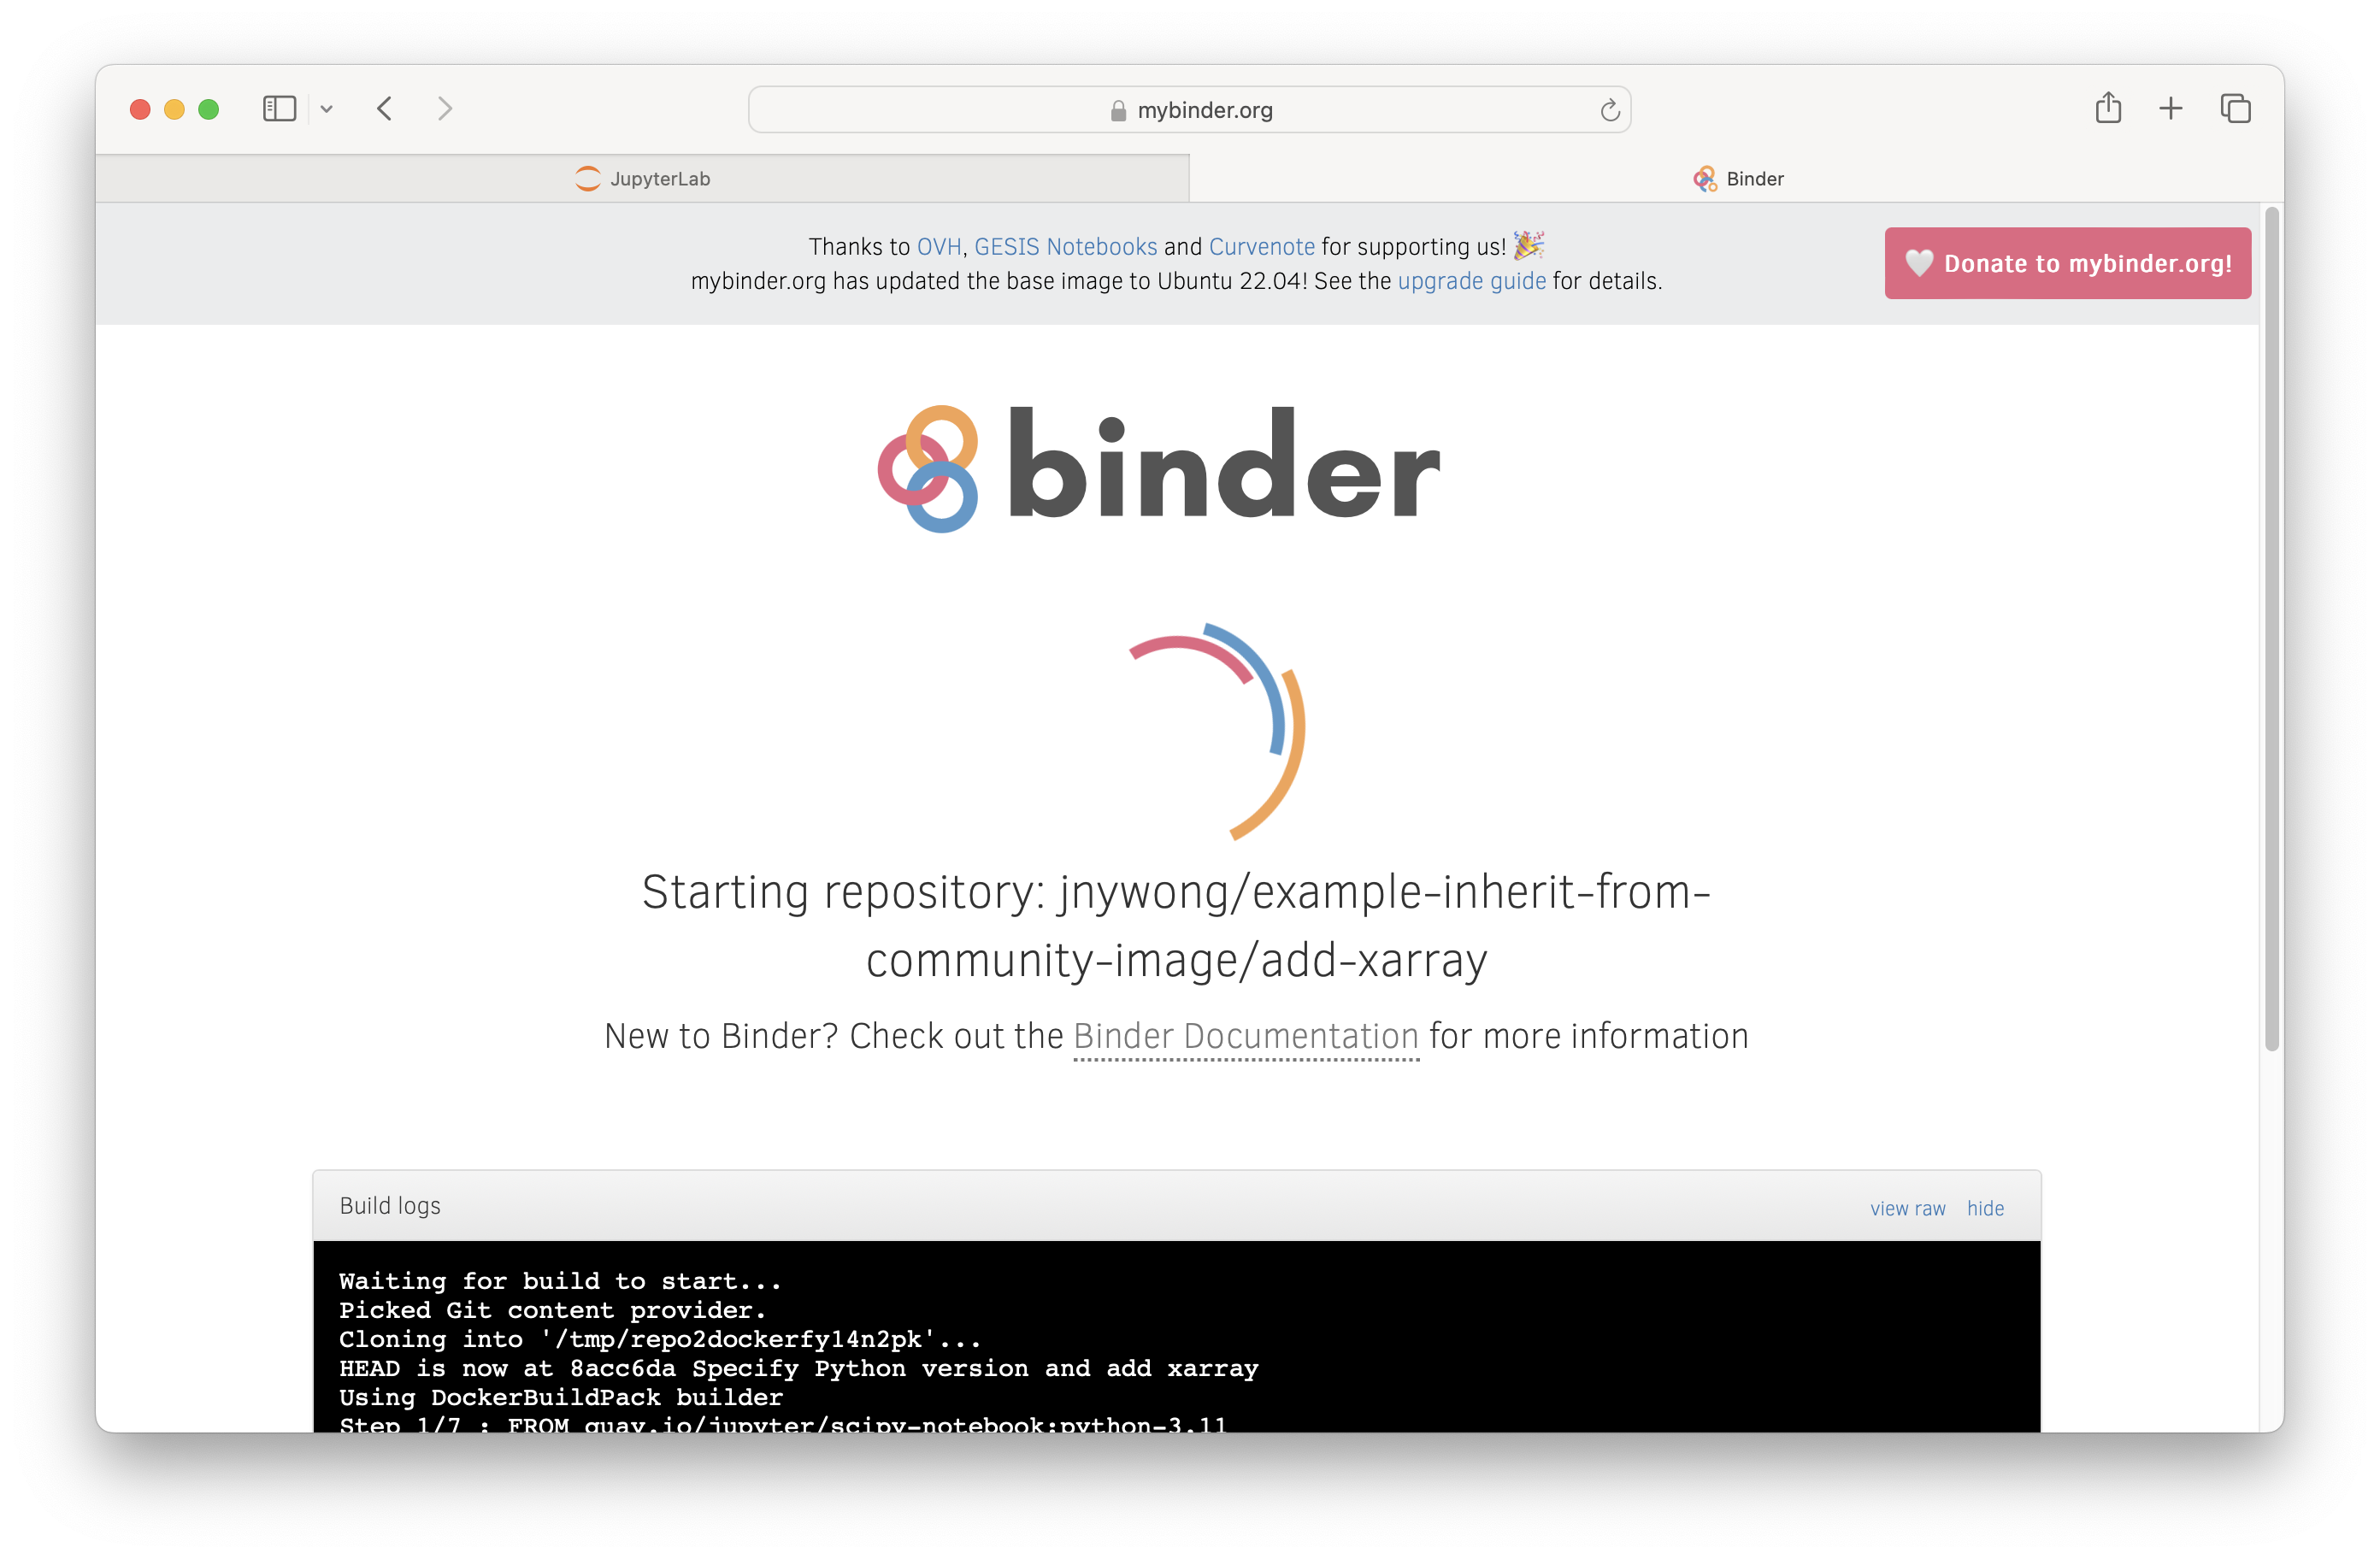
Test the preview of your custom environment. You can continue editing the DockerFile and environment.yml, then push changes to the pull request as required.
Link custom image to your hub#
When you are ready to push the repository to quay.io, merge the pull request to main on GitHub by clicking Confirm merge. The build process can take a few minutes.
You can check your image is updated on quay.io by navigating to a URL of the form
https://quay.io/repository/<username>/<quay-repo-name>, e.g. https://quay.io/repository/jnywong/jupyter-scipy-xarray, and then clicking on the Tags sub-menu to view a list of image versions. The full image tag is of the form<registry>/<username>/<repo_name>:<git-commit-hash>
e.g.
quay.io/jnywong/jupyter-scipy-xarray:739fec9705b1.Open a 2i2c support ticket to request an update to your hub with the new custom image.
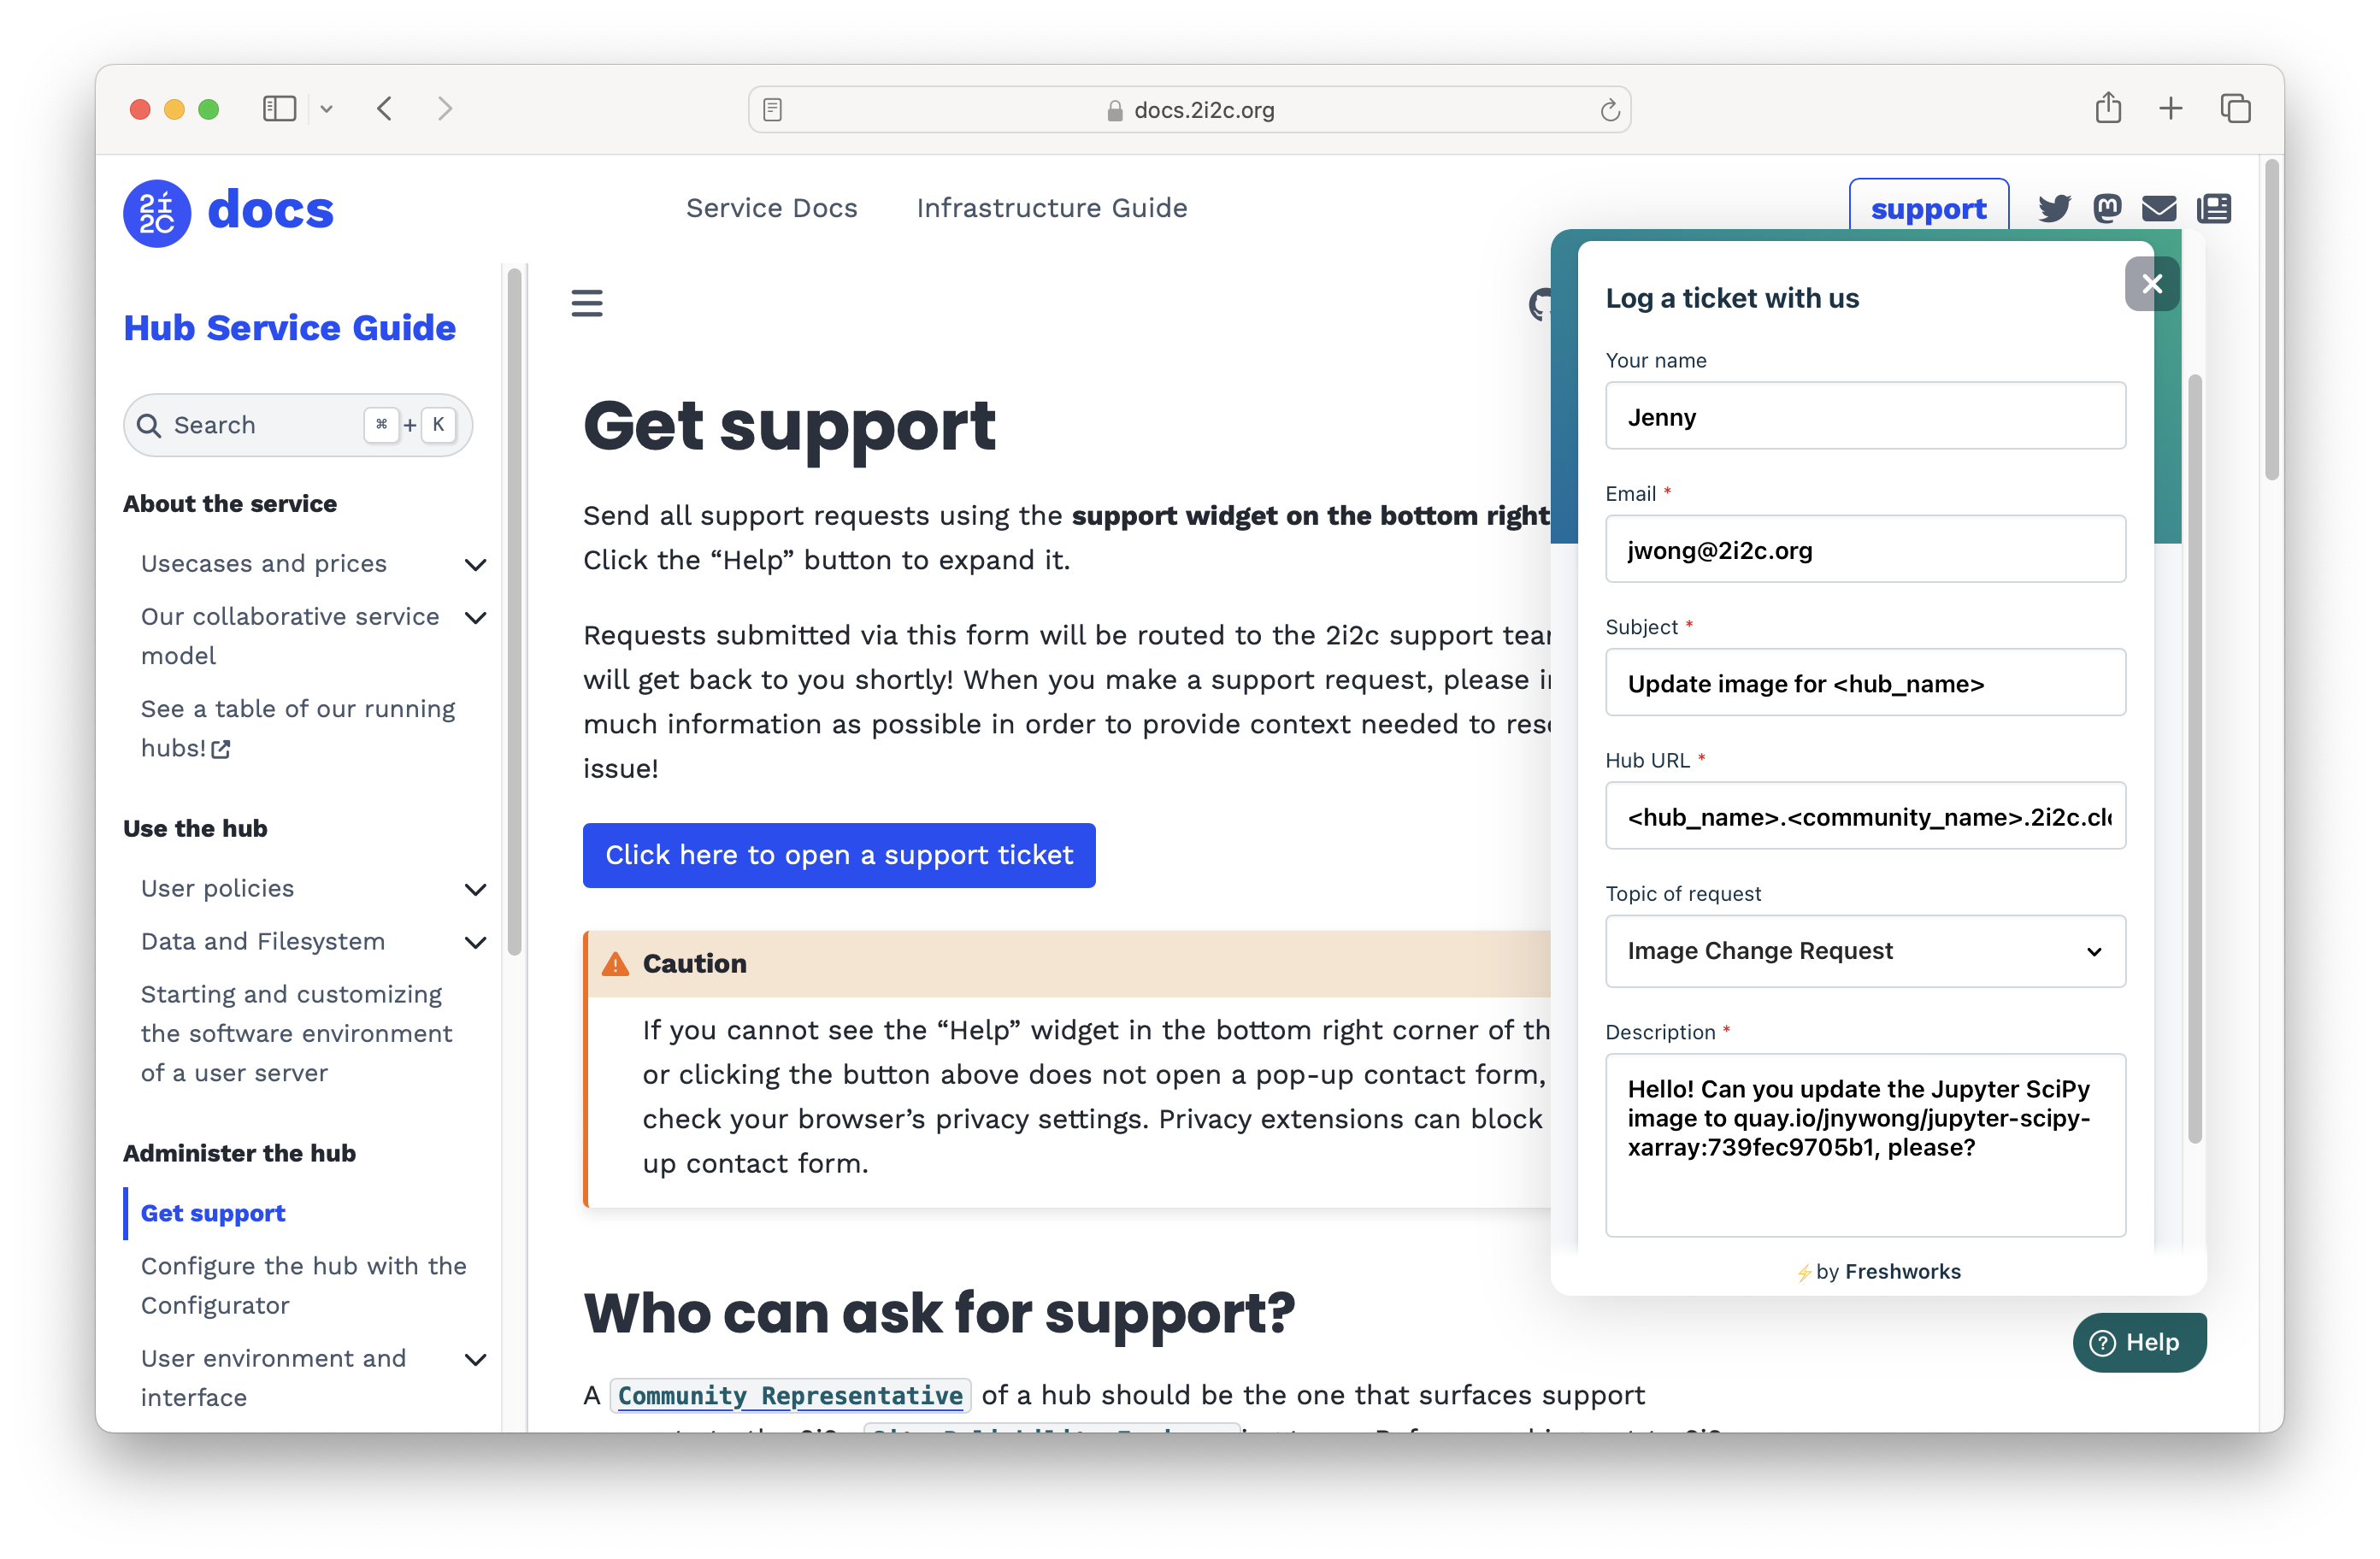
In the Topic of Request option, select the Image Change Request option and in the Description provide a link to the full image tag.
Click the Send button to confirm the support ticket request.